First Execution
Initial Window
When starting DEDiscover for the first time after installing following the instructions you will see the following pop-up:
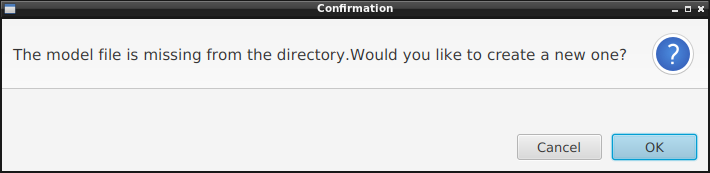
Confirmation message when launching DEDiscover for the first time.
This will result in creating a SQLite database named ded-model.db in a newly created .dediscover_2 directory located in the user home directory. This database originally contains several built-in models. Then this database will be updated with the sessions created by the user. Once accepted, the following window will appear:
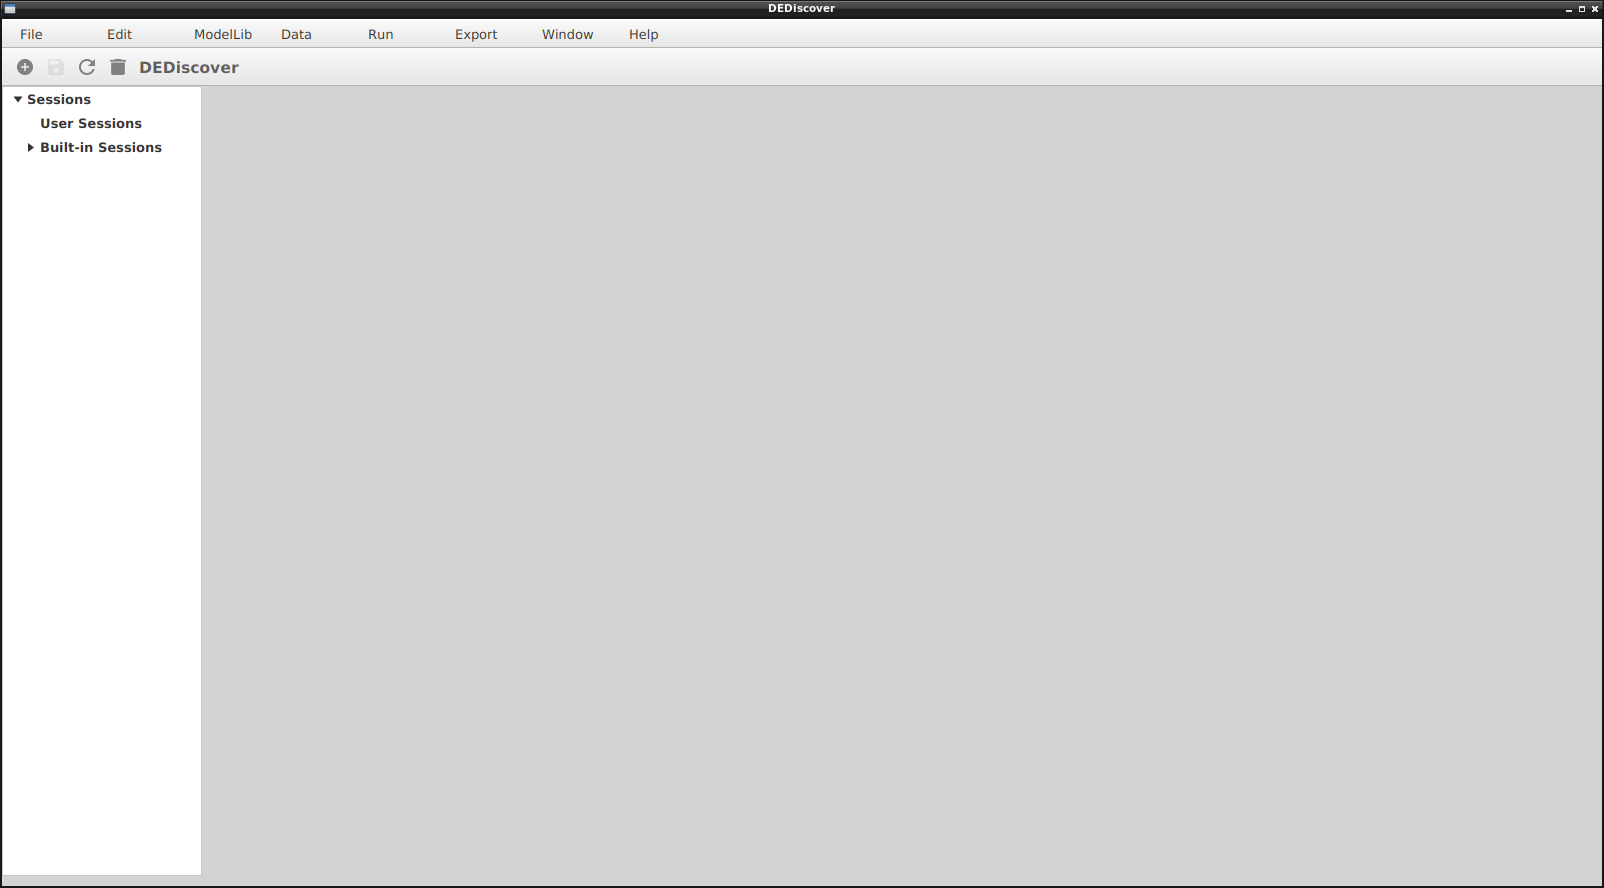
Initial DEDiscover window
Session Tree
The left window holds the Session Tree. The top section called User Sessions is initially empty and this is where the user’s sessions will be saved. Under Built-in Session one can find several built-in sessions that were distributed with DEDiscover. They can not be removed or edited, but can be copied, modified`` and saved in the User Sessions section.
Sessions are organized into packages which are list of identifiers separated by dots. For instance the built-in session named InfluenzaA is under the package Sessions.Built-in Sessions.Flu. A user can define any number of package as long as the naming rules are respected. What the rules are has not been formally established, but you should be fine if you avoid dots. Spaces and most special characters are allowed.
Session Contents
The work area containing the sessions is the right part of the window. It is initially empty. The next figure shows the window after loading two built-in sessions.
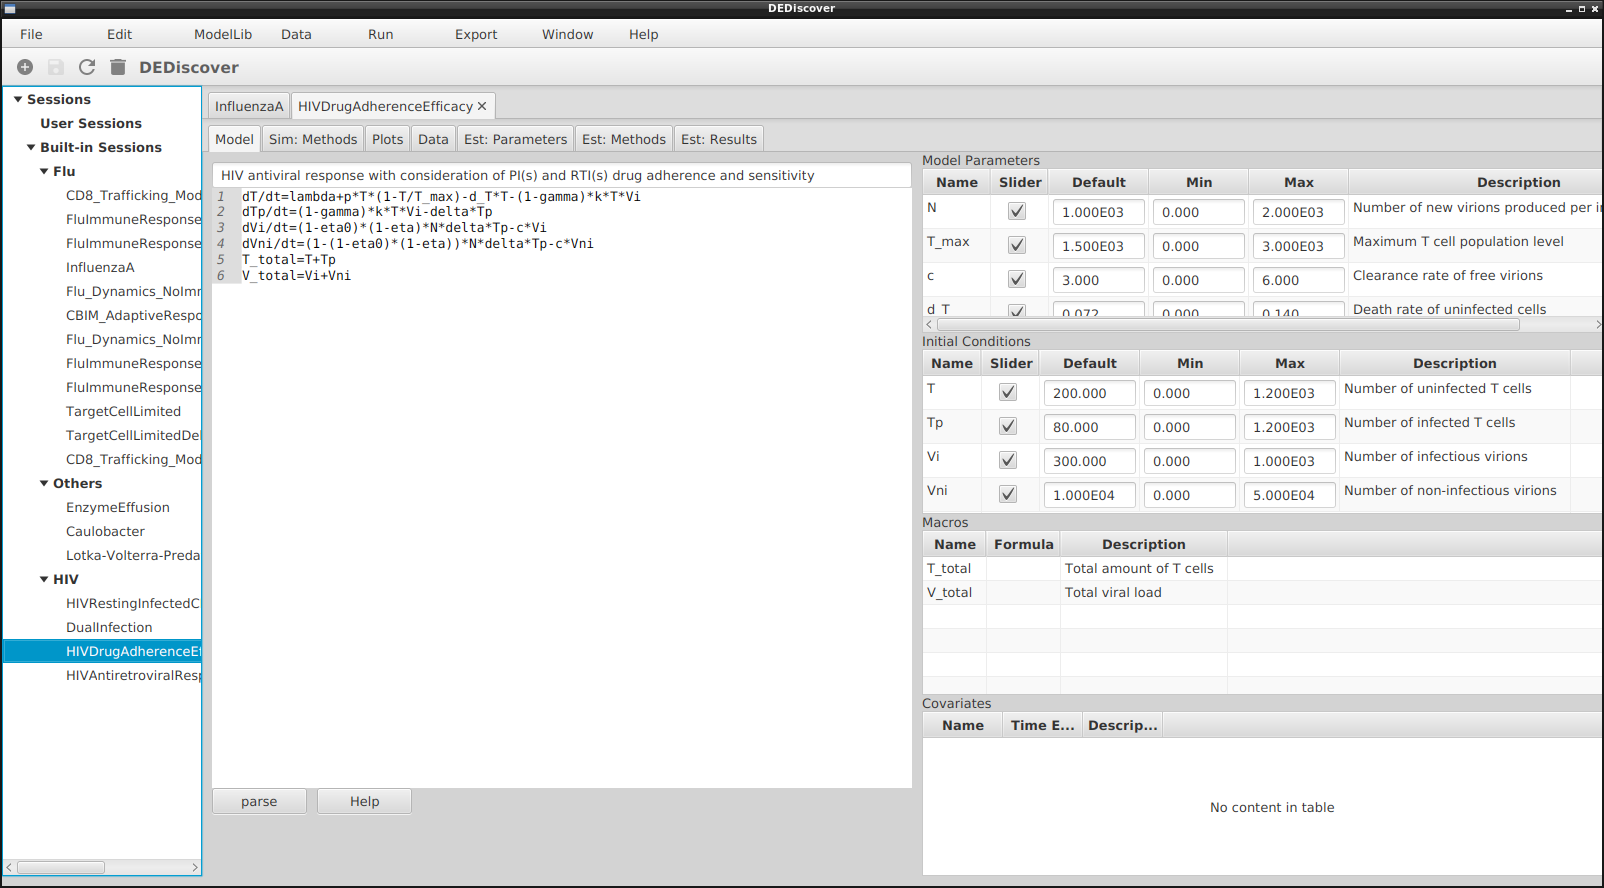
There is a tab for each session, in this case InfluenzaA and HIVDrugAdherenceEfficacy. Under the tabs for the sessions we see the tabs for all the features in DEDiscover which will be described in the next sections. The still rudimentary button bar and top menu have operations that apply either globally or to the selected session tab.